


Top Balayage vs Highlights Styles to Try in 2026
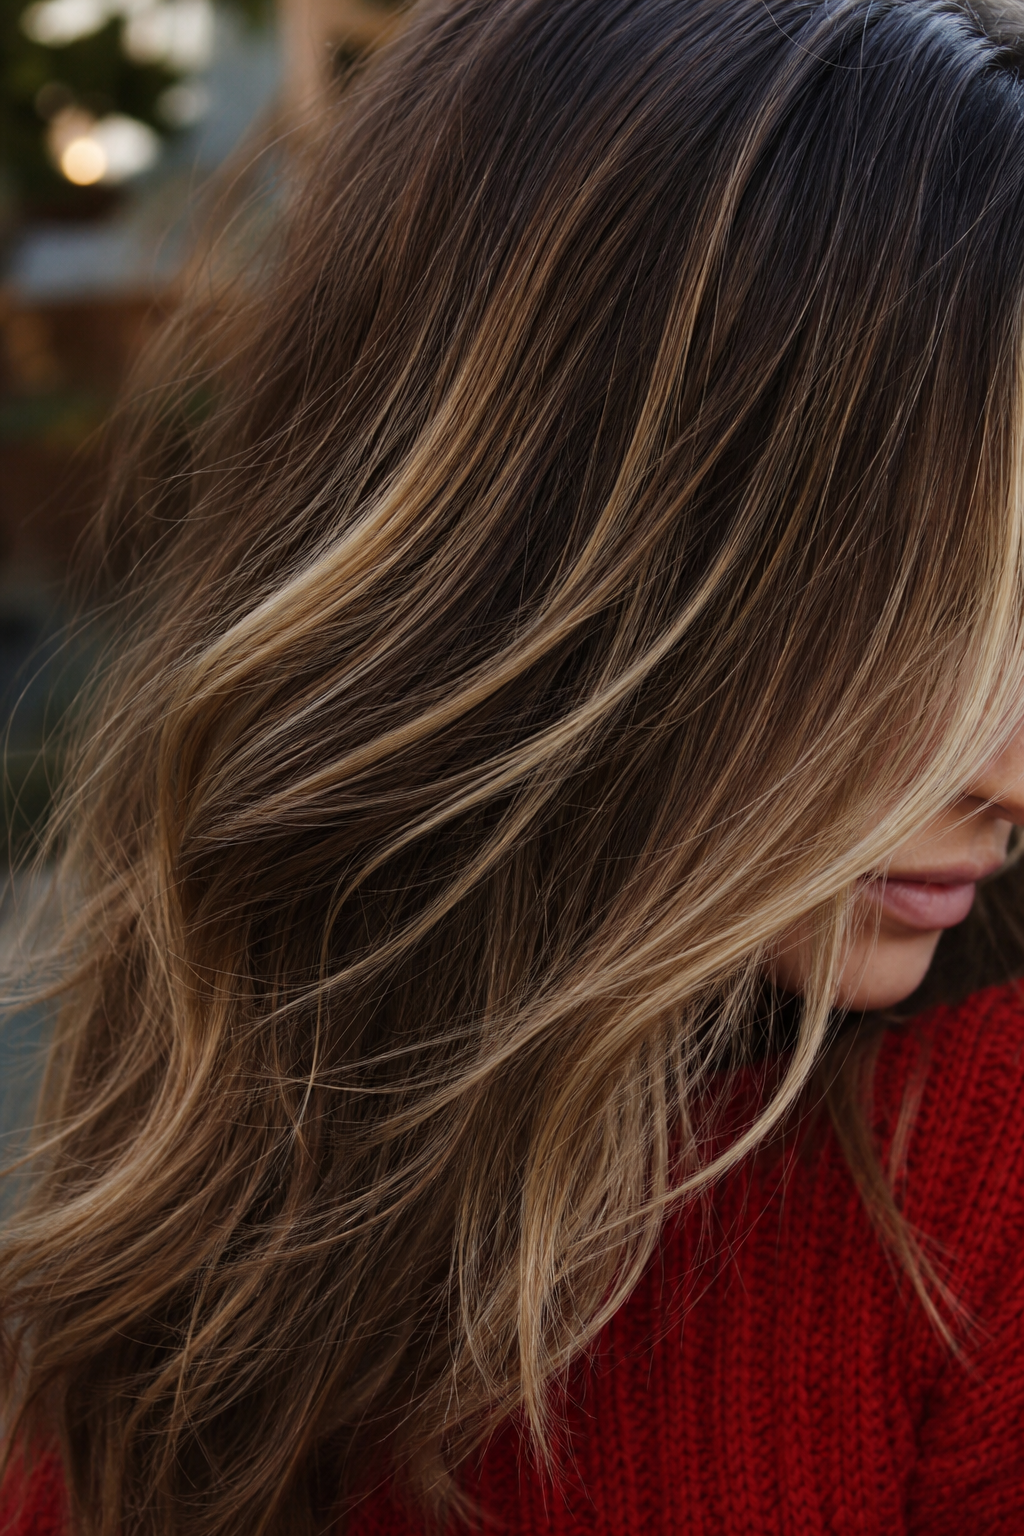
Want a fresh hair color that feels right for you? You’ve probably heard the buzz about balayage and highlights, but the details can get fuzzy. In this guide we break down the top styles, weigh their pros and cons, and help you pick the one that fits your look, schedule, and budget. By the end you’ll know which technique matches your vibe and how to keep it looking salon‑perfect.
1. Balayage , Natural Sun‑Kissed Look
Balayage comes from a French word meaning “to sweep.” A stylist paints color by hand, starting at the mid‑lengths and fading toward the ends. The result is a soft, sun‑kissed effect that mimics natural light. Because the color is blended, regrowth appears less stark, which many call low‑maintenance.
When you walk into a salon, ask for a custom balayage session . The stylist will first assess your base shade, texture, and lifestyle. If you have fine hair, they’ll use a lighter hand to avoid over‑processing. If your hair is thick, they may layer the color for depth. The technique works on any length, from a bob to a long cascade.
Key points to remember:
Starts at mid‑lengths, not at the roots.
Creates a blended, natural finish.
Generally requires fewer touch‑ups, though the upfront price can be a bit higher.
According to Wikipedia’s definition of balayage , the method is prized for its ability to grow out gracefully. That matches the industry consensus that it feels softer than foil highlights.
Real‑world example: a client with dark brown hair wanted subtle brightness for summer. The stylist applied a caramel sweep that lifted only the strands catching the sun. After six weeks the color still looked natural, and the client needed only a quick root touch‑up.
Key Takeaway:Balayage offers a natural, low‑maintenance look, but expect a slightly higher upfront cost.
2. Foil Highlights , Precise Contrast
Foil highlights use thin sheets of foil to separate sections of hair, then apply lightener. The foil locks in heat, giving a more uniform lift. Highlights start close to the scalp, so the contrast between the lightened strands and your natural color is bold.
Because the lift is controlled, you can achieve bright, dramatic shades like platinum or icy blonde. The trade‑off is a clearer regrowth line, which means you’ll likely need a touch‑up every six to eight weeks.
Here’s how a typical foil session unfolds:
Consultation: discuss the desired level of lift and any gray‑coverage needs.
Sectioning: the stylist pulls thin strands and places them in foil.
Application: lightener is added, then the foil is sealed.
Processing: heat is applied, usually with a lamp.
Rinse and tone: the color is set and the foils are removed.
The precise nature of foils makes them a go‑to for clients who want a striking, defined look. If you love the idea of bright blond streaks against a dark base, this is the technique to ask for.
Research shows traditional foil highlights maintain a 6‑to‑8‑week touch‑up cycle according to Wikipedia . That lines up with most stylists’ schedules.
Below is a short video that walks through a foil highlight session step by step.
Pro tip: ask your stylist to blend the ends of the highlights into a soft finish. It reduces the harshness of the regrowth line and lets you stretch the time between appointments.
3. Babylights , Ultra‑Fine Highlights
Babylights are a subset of highlighting that uses ultra‑fine strands to mimic the way a child’s hair naturally lightens in the sun. The sections are so thin they look like a whisper of color, giving a subtle glow.
Because the strands are delicate, the effect blends with your base shade, making regrowth almost invisible. This makes babylights a favorite for clients who crave a natural look but still want a touch of brightness.
How babylights differ from regular highlights:
Strands are finer, often just a few hairs wide.
Placement focuses on the crown, hairline, and areas that catch the most light.
Result is a soft, multi‑dimensional glow.
When you combine babylights with traditional highlights, you get a layered look: bold streaks for impact, babylights for a smooth blend. Many stylists recommend this mix for clients who want both brightness and low‑maintenance growth.
Imagine a client with medium‑brown hair who wants a summer glow without constant salon trips. The stylist adds babylights around the face and hairline, then a few wider highlights at the back for volume. Six weeks later the hair still looks sun‑kissed, and the regrowth line is barely there.
Real‑world tip: ask your colorist to use a “root smudge” technique with babylights. It softens the line where the new growth meets the lightened strands.
Pro Tip:Schedule a babylight touch‑up every 10‑12 weeks to keep the whisper‑light effect fresh without harsh regrowth.
4. Ombre , Gradient Fade
Ombre creates a clear gradient from a darker root to a lighter tip. Unlike balayage, the transition is intentional and often dramatic. The technique works well when you want a bold, fashion‑forward look.
To achieve ombre, the stylist applies color in a sweeping motion, but stops short of blending the shades. The result is a striking contrast that can be as subtle or as dramatic as you choose.
Key considerations for ombre:
Great for long hair where the fade can be fully displayed.
Works on any base color, from black to brunette.
Maintenance depends on the length of the lightened portion; the tip may need a trim as it grows out.
Clients often pair ombre with a subtle balayage on the mid‑lengths to soften the line. That hybrid approach gives the best of both worlds: a clear fade at the ends and a natural blend in the middle.
Here’s a quick checklist for ombre care:
Use sulfate‑free shampoo to protect the lightened tips.
Apply a deep‑condition mask once a week.
Schedule a root touch‑up every six weeks to keep the dark‑light contrast fresh.
Our salon often suggests a gloss treatment after the first ombre session; it adds shine and reduces brassiness.
Key Takeaway:Ombre delivers a bold gradient that works best on longer hair and may need more frequent root work.
5. Color Melt , Smooth Blend
Color melt is the technique that blurs the line between root and tip, making the transition look like molten paint flowing down the strands. It blends balayage tones with highlights, so there’s no harsh line at all.
The process starts with a base color at the roots, then adds progressively lighter shades toward the ends. The stylist uses a free‑hand brush to melt the shades together, creating a smooth gradient.
Why clients love color melt:
It looks natural even as the hair grows out.
The soft transition reduces the need for frequent touch‑ups.
It works on both light and dark bases.
One client, a busy executive, asked for a low‑maintenance look that still felt fresh for video calls. The colorist performed a color melt with warm caramel tones that blended into her natural dark brown. After eight weeks the color still looked cohesive, and she only needed a quick root refresh.
To keep the melt looking its best, use a color‑protecting conditioner and limit heat styling. A weekly gloss can also lock in the shine.
"A well‑executed color melt can let you skip salon visits for months while still looking polished," says a senior colorist at a leading salon.
Pro Tip:Ask for a low‑level toner after the melt to lock in the desired hue and prevent brassiness.
What to Look For When Choosing Your Style
Picking the right technique is less about trends and more about how your lifestyle, hair type, and maintenance preferences line up. Here’s a quick decision framework:
Hair texture and density
Fine hair benefits from babylights or a light balayage because heavy color can weigh it down. Thick hair can handle the bold contrast of foil highlights or ombre without looking flat.
Desired contrast
If you want a subtle, sun‑kissed vibe, go for balayage or color melt. If you crave a dramatic, runway‑ready look, foil highlights or ombre fit the bill.
Maintenance budget
Balayage and color melt often feel low‑maintenance, but the initial session may cost more. Foil highlights usually have a lower upfront price but need a six‑week touch‑up.
Color goals
Gray coverage? Highlights give better lift for blending gray strands. For a natural blend that hides gray gradually, balayage or babylights work well.
When you’re ready to book, PS Aesthetics Wellness + Skinbar offers expert color consultations . Their stylists know how to match each technique to your skin tone, hair health, and schedule.
Ready to refresh your look?Try PS Aesthetics Wellness + Skinbar free → Explore our services
FAQ
How does the cost of balayage compare to foil highlights?
Balayage tends to be slightly more expensive at the first appointment because it requires a skilled hand‑painting technique. Foil highlights usually have a lower entry price, but you’ll likely need more frequent touch‑ups, which can add up over time.
Can I combine balayage and highlights?
Yes. Many stylists blend both to give you the low‑maintenance feel of balayage with the extra brightness of highlights. The combination creates a multidimensional look that grows out gracefully.
How long does it take for the color to fade?
Fade depends on your hair’s porosity and how often you wash it. Balayage and color melt typically show a softer fade, while foil highlights can lose their punch after six weeks if not protected with color‑safe products.
Is balayage suitable for gray hair?
Balayage works well for gray hair because the hand‑painted strokes can be placed strategically to blend gray strands with lighter tones, creating a natural transition.
Do babylights require special after‑care?
Babylights benefit from a gentle, sulfate‑free shampoo and a weekly deep‑condition mask. Because the strands are so fine, harsh products can cause breakage.
What’s the best way to keep ombre vibrant?
Use a purple shampoo once a week to combat brassiness, and schedule a root touch‑up every six weeks. A gloss treatment every two months adds shine and extends the life of the color.
Can I do a color melt at home?
Color melt involves precise blending that’s hard to replicate without professional tools. It’s safest to let a trained colorist handle the melt to avoid patchy results.
How often should I book a salon visit for any of these styles?
Balayage and color melt can often go 8‑12 weeks between visits. Foil highlights usually need a six‑week refresh. Babylights sit somewhere in between, often 10 weeks, while ombre may need a root touch‑up every six weeks to keep the contrast sharp.
Conclusion
Choosing between balayage, foil highlights, babylights, ombre, and color melt isn’t about picking a winner; it’s about matching the technique to your personal style and schedule. Balayage offers a soft, low‑maintenance glow that feels natural, while foil highlights give you bold, defined contrast. Babylights sit in the middle, delivering ultra‑fine brightness with minimal regrowth lines. Ombre makes a statement with a clear gradient, and color melt blends everything into a smooth flow.
At PS Aesthetics Wellness + Skinbar , the team tailors each color journey to your unique needs, whether you crave a subtle sun‑kissed look or a striking, runway‑ready finish. Book a consultation today and let the experts craft a look that lets you shine every day.


Comments